Showing posts with label Cards. Show all posts

Wednesday, 26 September 2018

Perennial Birthday Stamp Set Easel Card


This lovely Perennial Birthday Easel Card - was a fun way to make a reasonably simple card with a difference... and once a gain I only used the one Stamp set.. Perennial Birthday (C Mount - 145760 - $38)..

With just a few different mat sizes of card stock and layering them you can make a simple easel card... adding a bit of bling and a few dimentionsals and Whoot Whoot.. there you go one pretty cool little number right there..

The flowers were stamped in Blueberry Bushel Ink (147138) and then using a dauber to colour in with Bermuda Bay Ink (147096).. then to colour in the leaves and the little flowers I used an aqua painter pen (103954) and the ink from the ink pads (Bermuda Bay and Shaded Spruce 147088)

I simply cut the A4 card stock in half long ways (10.5cm x 29.7cm) and folded it in half.. like a normal long opening card.. then taking the top layer you fold it back in half again..  and that is your easel part.. Adhere your card front onto it and you are in business...

 Here's a diagram of what I mean...


Have fun getting your Easel on!!


Simple Peek-A-Boo Card


This was a fun way to make a Peek-A-Boo card.. and super easy... It's a bit deceptive as it had the Peek-A-Boo bit adhered to the back of the card opening..  but it is a cool way to make a Card that moves...

With some simple Dsp and some random stamping you can make GREAT backgrounds and add a little colour and texture...  then stamp your feature image and whalah you've created a lovely little card..

In this card I used the only Petal Palette (C Mount 145788 A$61) Stamp Set.. Which is REALLY unusual for me to only use one stamp set.. but it just goes to show you that this set is GREAT.. and very versatile... Of course I had to dress it up a little with the Decorative Ribbon Border Punch Strip (143721 - A$28) and a bit of bling.. non SU.. because this was my community class.. and Budget is tight.. but you could imagine how AWESOME SU BLING would be!!!
And by simply using your aqua painter pens to smudge the colour in the stamping you can colour the image ever so slightly...

Sweet Soirée Peek-A-Boo Card

I was inspired by the lovely Joanne when she came over to share her show-n-tell to make this card... I've made similar ones in the past but it is always fun to have another go at making a fun moving card especially with PERRRTY PAPERS like the BEAUTIFUL Sweet Soirée (now retired) specialty paper from our holiday or occasional cattys... When you have some left over it's too nice to just store to look at.. So you gotta pull it out and let others enjoy the BEAUTY with you..!! We made it in so many different colour ways to use up the paper.. And of course some lovely Wink Of Stella to add a bit of bling bling to the belly band decorations... It's a pretty simple card to make really..
Hope you have fun  making a Peek-A-Boo card yourself.. xxoo

Saturday, 25 August 2018

Clear Block and Ink Backgrounds


Your Clear Blocks can be used to put colour on so that you can come up with some awesome interesting backgrounds for your cards... here are just a few examples of using your blocks as a stamp to get and interesting look for your cards..

I put Tranquil Tide ink onto an F size block and then spritzed with water.. then I laid the Lemon Lime Twist Card mat onto the block allowing it to sit for a little while to soak up the water and the ink then I lifted it off and daubered around the edges to finish it off a little... 


With this one hear my Mat was actually White Card stock and I put both Tranquil Tide and Lemon Lime Twist ink onto the block then spritzed with water... let it run a little and then put the card stock on top of the block to soak up the ink and water...  I have found this to be a really cool way to get different effects for a relaxed looking background...


For this Lovely card I used a D sized Clear Block  and stamped teh block into the light blue and then rolled the edges into a darker blue and then spritzed...

Once i lifted up the card I noticed that there was a little more ink/water combo on the darker colour.. so i just blew it with a straw to get the splotch look...


It's so much fun to experiment with colours and arty techniques.. I hope you have fun experimenting too!!


Community Class Cards

I have a FANTASTIC group of ladies that I teach every week at the Kingston East Neighbourhood Group.

I learned last year that I have been teaching there for 7 years.. I was shocked to learn that.. As it really only feels like maybe a couple of years.. but let me tell you something... As much as the ladies love my classes I LOVE teaching them.. they are my saving grace!! If I did not have them to teach each week I have no doubt I would become a hermit and loose a massive purpose in my life... I love seeing them and spending time with them.. being inspired by them and teaching them!!! I look forward to our time together each week.. and when it is school holidays I miss them dearly!!!

So here are a few cards from the past 6 months or so.. as you know I'm catching up because of technical difficulties.. and well.. there are loads of FANTASTIC cards to share....

This cute card above here was a bit fiddly but looks so lovely made with the now retired Fruit Basket Stamp Set and Punches.... I love the dark polka-dot background it really makes the feature stamping pop!!


This one was inspired buy a pinterest post using the Picture Perfect Birthday Stamp set...  WE also made a little gift tag to go with this one... but I seem to have missed taking a photo of it!!


I love Sale-A-Bration time of the year cause
Stampin' Up gives you extra stamp sets for purchasing your normal stuff... Wahoo.. Who doesn't like FREE stuff?? and This Stamp set was COOL!!
Epic Celebrations was one of those stamp sets that I think I may have to just hang onto forever..  Cause it is cool for Teen cards... especially male Teens... 
There was quite a few techniques used in this card. First we stamped the guitar with Stayz On and masked the Guitar and then stamped the Splotches in the background in crumb cake ... then on a separate piece of card stock we stamped the shoes in Stayz On and then painted the images with Aqua Painter Pens and ink..Using Stampin' Markers we inked up the greeting by wiping the colour on a diagonal... Then in this 2nd card when I taught it again to another class you can see that the shoelaces are a little more pronounced.. We coloured them in with a White Gel ink pen...


Yet again another Sale-A-Bration card made with the
Beautiful Peacock Photopolymer Stamp Set.... there were so many things you could do with this one... the one on the left has rock n roll an heat embossing and the one on the right has  ribbon fringing and fraying...


Oh and this little PARTY PANDA S-A-B Set.. oh my word... So Cute!!! 

The background is on watercolour paper and we just used some re-inkers and aqua painters to drip the colour onto the page.. then you stamp the Panda on extra card stock and cut him out... He is just so cute!!!


And this one was done just for fun because it was one of my ladies Gym Trainers Birthday.. adn she wanted to make him a quick little card but had no stamp sets to suit...

Turns out neither did I.. so we came up with this little (QUICK) punch art set of hanging boxing gloves..

She was very happy with the result... Phew.. Talk about pressure... all goods.. I love to be challenged and to think outside of the box...

BEAUTIFUL Unicorn Card


OH MY GOODNESS!!!! How ADORA-BUBBLE is this card??? It has to be one of my all time ABSOLUTE FAVORITES!!!!

I saw it on pinterest and just had to replicate it... only beign that I like to take things just that little step further I added a little blush to the cheeks and the Drag Queen blue eye shadow with daubers and ink!!! I just love it.. and would be SUPER happy to recreate it any day of the week!!!

How much do you love it????


Friday, 27 July 2018

Colour with Brusho - MAGIC!!!

Have you discovered the MAGIC of BRUSHO???

When we were introduced to it at the On Stage Event I knew I just had to get it!!! I love the random effect of colouring with it..  there are so many tutorials on the net for how to use it but what i have discovered is it is just through playing with it you learn what you can do... It is so much fun watching the colour magic happen right before your eyes... If you have not played with these wonderful colouring products you need to get onto it right away!!!


This was one of my first plays with Brusho... by embossing with white and then spritzing with water and sprinkling Brusho on you can come up with this BEAUTIFUL effect!! It is so easy.. just e sure not to sprinkle too much Brusho powder as a little goes A-LOOOOONGG Way!!!


Using just one colour you can make some fantastic backgrounds for sky or clouds.. this card was inspired by a pinterest post.. I just had to copy... Some people are just so clever!!


And then when you just want a really random ball of MAGIC COLOUR.. you can add all the colours to your pallet... to see how it turns out!!!


Have FUN getting your Brusho on!!!


Fridge Magnet Gift - Stampin Blends


For Easter this year I wanted to make a cute little card that could also be a gift .. cause this little retired sheep stamp is just too stinking cute to put in a draw or throw away... So I thought to myself.... "Self, if I make the little matt feature a bit that could come off and then be attached with magnets to the card you could take it off the card and put it on the fridge to keep FOREVER.. .... " Ohhhh these thoughts were so exciting!!!

And Whalah.. this is what I came up with for one of my community card classes.. It was such a success that I thought again that this could be a great swap for the April On Stage Stampin' Up! Event...  Of course you have to keep it with current product etc... so I got to BLENDING with my new Blends and oh my.. how I LOVE these!!!


I had a stack of these little mini treat boxes left form a class that I didn't quite get around to... so with inspiration from the lovely Rosa.... (one of my BEAUTIFUL team members) We came up with these little Ferrero Rocher
gift boxes... And because the decoration on the front of the box is also a little magnet it is a DOUBLE gift... Cool right?


I LOVE my BLENDS.... And now that we have MORE and MORE colours.. It is just so exciting!!!!

Of course a little kindi glitz doesn't go astray!!!

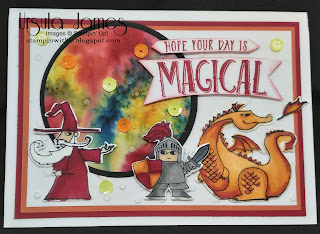
I was so sad when this BEAUTIFUL Magical Day Stamp set was not returning.. I do not think I got enough use out of it.. but it is definitely one that I will be keeping cause I LOVE it also!!!


Check out the mermaid from the Magical Day Stamp Set... I just love her too....


With all the fantastic colours you can do some really cool colour variations.. and use all kinds of shade of Kindi Glitz too.. heheh.. Love it!!! I had so much fun making these..


And just for a few more I though I could make some cupcake magnets... these I sprayed with some banana, vanilla and strawberry scent..


Then to finish it all off I made some Magical rainbows...  These were pretty cute too..

It is always fun to swap with other demos from all over.. and It is such a great way to meet new people... and to be inspired by their creativity!!!  I love it.. and if I have time I will always try to participate in them at all the Stampin' Up! Events I am able to attend!!

I hope you can come up with some of your own little "forever" gift magnets for your creations.. Just taking the gift of a card one step further...

Using Scraps - Card Making


SCRAPS... Man I have HEAPS!!!.. So last year I made many of my classes FOCUS on Using up some scraps..

here is how I organise my scraps.... I have folders of coloured card stock... Scrap bits... and some retired colours... all in PVC envelopes sorted into individual colours and close ish colours...


 I have a 12' X 12' BOX FULL of scrap DSP... if it is less then a 6' the bits go in there... and sometimes it can be a real nightmare to find something you may like to use... so then I can do this to help more..


SO then If you want to be kind to your customers.. or save yourself a little bit of a head ache... you can further sort your scraps into colour PVC folders... this is an example of a folder that I sorted into pink and purples... It makes it MUCH easier to find a colour you may be looking for when you have gone to this extent.. But I must warn you.. this kind of thing is VERY time consuming... It takes forever!!! SO just do a little at a time.. otherwise your will have scrap sorting burn out!!!


Then you can easily pair your card stock with your DSP scraps to match...

Here's another sorted PVC folder I did ages ago... with neutral colours..

This sorting makes it super easy for you and your customers to make up a card that you have a sample of for them to copy... and they can choose their own.. And it REALLY is a HIT!!


Here are the example of the two cards that were made from these scrap colour combos...


The only limitation is ones imagination!!

GO forth and be TOTALLY creative!!

Oh and I have a scrap container of ribbon also.. everyone loves picking through that to see what ribbon they will use..

Here's some more SCRAPPY inspiration...


I hope these inspired you to use those scraps more..

Handcrafted by Ursula's Fan Box

Pinterest