Wednesday 1 December 2010

Harry Potter Sweets... With Stampin UP!

This week we had a girly day out to GOLD class movies... just to spoil ourselves before the onslaught of the madness of kids on School holidays and Christmas.. I got this FANTASTIC idea for a party bag from some of my friends on Facebook.. They have done Twilight and Harry Potter treat bags.. and man they have been really Awesome.. some people are just soooooo creative!!! .... so I wanted to try doing some myself.. and WOW Stampin Up does make them look really professional!!! How much FUN!!!!

Harry Potter Sweets... With Stampin UP!I Googled Harry Potter Candy images and came up with some of the candy that gets a mention in the books and the movies... Above I have the Honeydukes Chocolate Frogs... and wouldn't you know it Elegant Eggplant went BRILLIANTLY with the label.... Which we had to do a little remaking cause the best image we could find was a little blurry... So saffron was close to the Goldy colour so I used a little strip on the side of the box and punched it with the Scallop Trim Border Punch.. How AWESOMELY did it go with the look of the label??? It really finished off the box quite well!!! We had 5 different flavored Fredo Frogs in the box... Yum Yum!!!

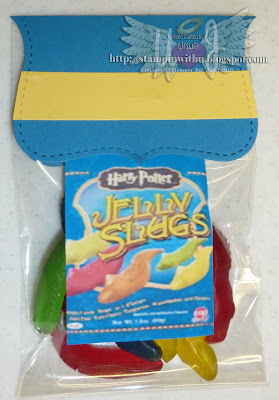
Harry Potter SJelly Slugs - With Stampin UP!The Jelly Slugs label went PERFECTLY with Pacific Point card stock.. And I used my Big Shot to punch out a bag topper..... Of course I could not find anything that looked like a slug sooooo I put a few snakes in the bag.... Close enough....

Harry Potter Bertie Botts Beans - With Stampin UP!
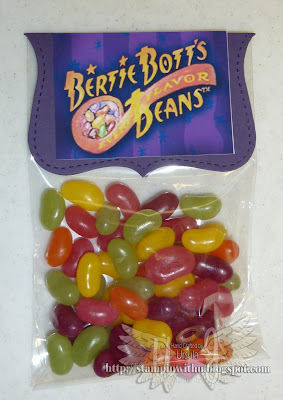
Bertie Bott's Every Flavor Beans..... This label went perfectly with Elegant Eggplant again....
I put some mini Jelly Beans in this bag... and man Were they SWEET!!!!

Harry Potter Movie Treat Bag... With Stampin UP!
I put all out treats in a lovely bag and presented them to the girls just before going into the movies... It was a hoot.. and made it all the more special!!! I also printed out a label for some Butter Beer... in the photo it looks a little bad cause the condensation got to it but when I dried it off and put it in the fridge overnight it dried right out and the crinkled label looked quite authentic... I really wanted to have a bottle of Ginger Beer for this one but the shop was out of them.. so I went for good old lemon lime and bitters....

I printed all the labels on sticky photo paper to make it REALLY easy to stick on each item...


Fantastic Memories..... Thanks girls for sharing it with me!!!

11/7/15
Here are the labels and Pattern for the Frog box... If you would like to make them yourselves...
This has been a very popular request over the years.. hope these images help;)... If I knew how to attach a PDF I would attach the original docs... one day I may learn... xxx ENJOY!!!


Love Ursula

Dress up Christmas Class

If you did not come to the class you will have missed out on these FABULOUS projects..
We made 4 Cards, one 12x12 Scrapbook page and a Christmas decoration...

Dress up Christmas Class CardsHow BEAUTIFUL is the Flocked DSP? I love the simplicity of the little card in the bottom left corner.... One stamped image, a little DSP, a knot of ribbon and a greeting on top.. This one you could mass produce quite easily!!! And it would be very cost effective!!!

Dress up Christmas Class Scrapping PageI'm yet to find some suitable Christmas type photos to put on this Scrap page... and how easy was the Joy embellishment? Cut out with the big shot oval die...

Dress up Christmas Class Tree DecorationAnd in the decoration is the Joy embellishment again only this time we embossed it with clear embossing and the little bird was coated with crystal effects to give it the shiny dimensional look... Just lovely!!!

We had a lovely time and enjoyed learning a few new techniques... Thanks to a fantastic class designed by Liz....

Stamping on a Frame

A few weekends ago a girlfriend came over to have a crafty day... And she bought one of her projects that she wanted to complete for a personalised wedding gift.

When I saw the invite that she wanted to include in the frame I suggested that she stamp leaf images around the outside of the frame.. and WOW it turned out fantastic!!!

Stampin on a frame with PaintWe spray painted the silver base colour and used acrylic paints applied to the stamp with a Dauber.. and stamped randomly around the frame.... I do believe that it turned out just lovely.. And very personalised!!!

Voting Ribbons

Recently my Son was running for School Captain... and he had to have a campaign and some badges and flags or things to hand out to the kids at school to remind them to vote for him.. we had fun making at least 150 of these.. We used a whole heap of Scrap card stock and left over ribbons... It was amazingly quite Quick... I love Stampin Up punches!!!!

He had a blast making them and LOVED handing them out to the kids at school!!!

Unfortunately he was not awarded School Captain or vice captain. I reminded him that just because he does not have the title there is no reason that he can not be a big support to the ones that were elected...

School Rep Voting Ribbons

Friday 5 November 2010

Christmas Stamp N Stack

I love a good Stamp 'n' stack class because it is quite easy for me to prepare the cards as the formula is very similar for each card... Its just the layout and the stamping that changes it up..

Take a close look at these Night of navy based cards.. they all have the same size rectangular piece on them and they all have strips of DSP and or card stock in the formula... to help create individuality in each of your cards you can layer the pieces different ways... Then to further their individuality and appeal you can use border punches, distressing techniques and tearing to change it up.

Blue Christmas Stamp N StackAs you can see all these Sahara Sand based Card stock cards all have the DSP as the background layer with Square accents and embellishments with a strip of card stock as their basic lay out...

It can be that easy to make cards that are totally different but save time and energy while you mass produce them... Sometimes the cutting of the materials is what takes most of the time... When you get into the swing of things it can go quite fast. After a little while spent designing these cards I was able to prepare and cut this class for 8 ladies in about 1 & 1/2 hours... Now if I had a guilotene that cut more than one peice of card stock at once I could do it in a matter of minutes!!! Oh the bliss!!!! One day ... yes one day I will own or gain access to one of these fantastic machines!!!!

Christmas Stamp N Stack 2nd TimeOn the strip on the bottom right Reindeer card I wanted some background stamping and because I try to keep a Stamp 'n' Stack simple and only use one or 2 stamp sets I thought the Reindeer antlers would be a great background stamp for a small strip... Just stamp it over and over again and whalah you have a lovely little background stamp...

I hope this gives you some ideas for your own Christmas Cards...

PS... I love the Elegant Soirée DSP.. just in case you couldn't tell.... heheheh

Circles Die Cut - Stencil

Did you know that you could use the left overs of your die cut to created a stencil????
Me either until we were shown this really great idea at Brisbane Regional Training....
I love that Stampin' UP! attracts and is so full of talented people with FANTASTIC ideas!!! As long as we have stamps, ink pads and paper or card stock I believe the creativity will never run dry!!!!

At our September PaperANGELS Meeting this was our 2nd project for the night.. We replicated the top one from Regionals... Using the negative as a template you can sponge your desired ink colours on to your card stock... (I suggest that you use some dotto to stop your stencil from slipping around...) then while you still have the stencil over you stamp your images in black StayzOn... What an AWESOME effect this creates.. very stylish...
Circles Die Cut - Stencil CardsAt one of our Bayside craft days we decided to change the colours up a bit and we created the bottom one with more subtle colours....

Paper Lantern Tea light Cover

At our September PaperANGELS meeting we made a lovely Paper lantern Tea light cover...Lg Paper Lantern Tea light Cover We used the Top Note Die cut to create the windows.... and the Vintage Wallpaper embossing folder on some thick card stock velum to created the detail in the windows.. It was a really great idea... and rather inexpensive to create for a themed party or something... Liz gave us the basics and then we were challenged to do something more with it...

While I was at Liz's helping prepare for the meeting I wanted to make a smaller one so this is what I came up with...
Small Red Paper Lantern Tea light CoverIt's a sweet little red white and black one.. with a bit of Crumb cake too... hehehe
I stamped with opaque versa mark on the windows and made the window shapes with the curly label punch.. Punching out just over one and a half of the label punches. It is a beautiful idea and could really light up your table decorations for a special occasion...

Now of course you would not put an open flame in them..Being that they are made from card stock and all.... You would use a battery operated tea light... I believe you can pick them up at most Big W stores....

Happy creating!!!

Thursday 21 October 2010

Art Therapy - Creativity - AMAZING!!

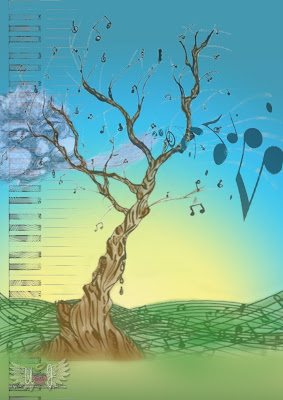
Art Therapy TreeI met a really interesting lady on the weekend. I was attending a Beta Sigma Phi convention where I had a display for Stampin' UP! at.... I struck up a conversation with one of the BSP ladies and she told me a little about herself and her profession... although she is retired now. Jan is an Art Therapist and Psycologist... this really intrigued me..What a cool profession.... She told me of an interesting "gimmick" (as she called it) that she would get people to do to discover some things about them. I so wanted to have a go at this.. it really excited me!!!! So Jan gave me the instructions of what I was to do.... And left me too it while she attended the next guest speakers presentation for the day... I was to get a piece of paper and on one side draw a single tree, then on the other side draw 2 or more trees.

Now whilst drawing the trees I was not thinking of anything other than drawing them... and how I could make them different... or how I could fill the page out better.. What more could I add to the page to make it look more like a complete picture? etc...

When Jan came back she looked at the pictures... Taking the single tree first... She said I payed a lot of attention to detail. That I was nurturing because of the grass around the base of the tree. That the trunk of the tree was solid so I am a solid person which is good... Then she held her fingers up the way my mother would do if she were drawing something to get the proportions right.... and what she said next just BLEW me away!!!! She said "now when you were about 13 or 14 something happened in your life that made a very big impact... It has really affected your life" I started to tear up!!! My mother was diagonosed with a Brain Tumor when I was 14... And yes indeed it has impacted my life in oh so many ways!!! For good and for bad... She also looked a little flower that I had drawn off to the right of the tree. "now this flower... It has 4 ... 5 petals ... 4 are well formed and one is kind of scribbled out.... I have a feeling that this flower relates to your own family or to a family that is very close to you" Again you could have blown me over with a little puff of wind.... There is 4 people in our family and I had always thought that we would have another child... but as my husband had Chemotherapy and as time progresses I am sure this child will not come into our family.... there were many more things she told me about my picture and more yet again when she went to the picture of the 2 or more trees that I drew... I could not believe how spot on she was... it was kind of eerie at first... then a little exciting... then totally amazing... How one could get some much from a simple drawing of a tree... Jan told me that if you were to draw the same picture every other day it would say different things about you every time....

Jan also told me that my "art was an escape from reality".... And it is.. It has been my saving grace especially throughout the last 5 years with my Husbands illness... And that my "art is a kind of obsession"... Do you think a 6x9 Art studio indicates that??? hehehe.... Plus the fact that I love to learn new things and try out all kinds of mediums, projects, costumes, etc etc... and have a large collection of materials to do all of these different projects with???

What a blessing it is to have art and craft in our lives... In its various forms!!! What a blessing it is to have hands, minds and imagination that God created; that can then form, mold and create!!!! How amazing is it to see others talents and creativity? I am always in awe of others creations... And no matter how Amazing my projects are to others I am always so much more impressed with others creativity... How Individual people are. How a little of their own personality comes out in each creation. How they develop skill, talent and passion. We all should be in awe of our own abilities and know that it is ok to stand back every now and then and appreciate our work... for when God created the Earth he stod back and "saw that it was good". We are created in his image.. We are a large part of Gods creation. Each one of us are an individual thread in this tapestry of life. What a blessing it is to take hold and make it a more beautiful world... one creation at a time...

What an amazing experience this was for me... To spend a few moments drawing a picture or two and to have Jan use her talents and skills to extract such personal things out of it. A simple gift to her that she has obviously developed over many years... But what an amazing tool art is...

I encourage everyone to be CREATIVE.... release all the inner emotions and feelings... Release the creative genius that is waiting to explore.... Experience Art in any form you can get your hands on!!! Develop skills and talents.. Grow and learn... It is DIVINE... We are Divine creations in the hands of the Lord....

Wednesday 20 October 2010

October - November 2010 Classes & meetings

Angel Ave CLASSES

October-

Friday the 29th 2010 .... Owl about Owls 7.30pm… Cost $10

Includes all materials needed to make 3 lovely cards using the owl punch and various other stamping’ UP! equipment. Please BYO basic took kit. Glues scissors etc.

November-

Friday the 12th 2010… Double Spread Birthday Scrap Class + 3 Cards… Cost $15

Make a lovely Double page Spread for a birthday lay out, with pockets for tab journaling and use the BIG SHOT to make your lettering. As well as 3 other (any occasion) cards. Please BYO basic took kit. Glues scissors etc.

Friday the 26th 2010… 4 Cards class… inspiration taken from my last lot of regional swaps… Cost $10

Please BYO basic took kit. Glues scissors etc.

There may be another class with Christmas theme too.. so stay tuned for this one….

I have had a few requests to run classes on other times/days than the Fridays. If you like the sound of the classes that I am running and let me know you would like to come I can advertise for another day/date. Or gather 2 or more friends together and have your very own private class. And if you have requests I am more than happy to accommodate your needs and wishes… Just drop me a line or call me…

PaperANGELS Monthly Training Meeting…. If you are interested in finding out more about our WONDERFUL PaperANGELS group and learning more about paper Crafts.. Come along and be inspired at our monthly meetings… We have a lovely time and have in-house (friendly) competitions and challenges every month between the demonstrators… At the moment the challenge is to design a lovely make n take card that other demos could use at their workshops. And to design a card or scrap page or project that you could demo at a workshop… So this is very practical to help all demonstrators… Even the veterans learn new things!!! At the meetings we always do at least 2 projects and we are inspired by Angels show and tell or experiences with their workshops and classes. We are a very sharing and caring group of demonstrators. It would be lovely to have you join us at our meetings. Cost is $5 which goes to room hire and project material costs. You are welcome to bring a friend if that would make you feel more comfortable. You must let either myself, Liz or Bec know so that we can be sure we have enough project material. BYO basic craft tool kit with glues etc.

As of last month we have started to have training meetings at Angel Ave too.. So if you are interested in coming to these please let me know.

October Angel Ave meeting is Wednesday the 27th @7.30pm-9pm

October Southside meeting is Saturday the 30th @ 2.30pm-5pm

November Northside meeting is Monday 15th @7.30-9pm

November Southside meeting is Wednesday 24th @ 7.30pm-9pm

November Angel Ave meeting is Saturday 27th @ 10am-12pm

Southside venue is Wynnum Manly Leagues Club, Kougari Oval, 92 Wondall Rd, Manly West

RSVP to Liz Collett – liz@daniche.com or 0448 896 001

Northside venue is at Rebeccas in Warner .

RSVP stampinwithbec@netspace.net.au or 0403 071 367

Angel Ave venue Rochedale.

RSVP Ursula naturallyu01@hotmail.com or 0410 602 916


Tuesday 19 October 2010

1-3/8" Circle Punch Flower

I LOVE the Elegant Soirée Papers..... $16.95 (Page 127 Australia Ideas Catalogue 2010-2011)

I've been wanting to try out this flower embellishment for months.... using the 1-3/8" Circle punch!!!

I am glad that I took that opportunity last week in my scrapbooking class... it is not hard to make just a little fiddly... You fold the circle in 1/2 then in 1/2 again.. then you unfold them and fold the edges around to the center... to create a cone like shape... which is then each petal.. You need 8 of these to create the whole flower...

1-3/8"  Circle Punch Flower Embellishment Now I did not have any buttons to put in the middle of the flower so I took the 1/16" Circle punch and made 2 little holes for the button holes.. then punched it out using the 1/2" Circle Punch... Then using Crystal Effects you can make the button Convex and quite thick with a generous coating... You do need to allow this to dry for an hour or so though placing it on plastic so that if it does stick you can lift it off reasonably easy.... With this technique under your belt if you do not have buttons to match your project there is a way that you can create them yourself....

Gathered Ribbon Embellishment
And I also wanted to try this new technique with ribbon that we learned at Regionals too... You take a single fiber of the satin ribbon and gather it... Then use lots of glue or tie it off so that the gathering is secure... It is a really nice embellishment to add that shabby chic look....

1-3/8" Circle Punch Scrapping PageFinally this is the whole page.. It is quite lovely... Very simple... with just a little bit of fussy la la ness....

Love Ursula

Thank You Cards - Booklets

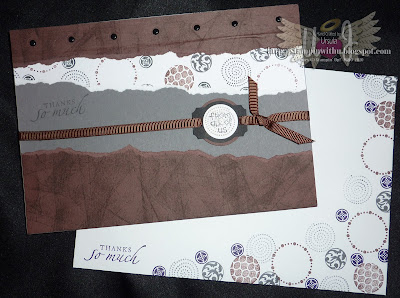
Booklet Card Male - CirclesThese are something I like to make... They are cards that lots of people can sign and write quite a few things in... I made these for the Queensland Festival Chorus members to say thank you to all those who made our last tour (July 2010) possible... I didn't take photos of all of them unfortunately but at least there are a few.... here...Booklet Card Circle Circus MaleBooklet Card Circles and Star CardBooklet Card Sunset TreesWe had such a wonderful successful tour.. What a fantastic memory and legacy we will all have because of this experience!!! You can read one of our reviews here.... It will live on in my memory forever!!!!
Esplanade Concert Hall Saturday (10 July 2010)

Stampin' UP! Brisbane Regionals 2010 Swaps

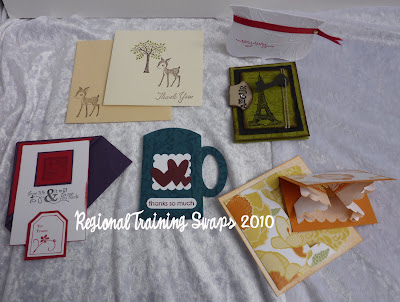
These are the swaps that I received... I was a little sad that I did not swap all I had made.. but when you are to be a presenter at a training meeting you help to set the rooms up, the make n take boxes, Put up the display boards and help register other Stampin' UP! Demos as they arrive for the day... .. so we worked our little hearts out.. but it was fun.... and not with out it's rewards.... :)

Who Who.. says the owl is not cute???? He seemed to feature on quite a few cards.. Looks like he is quite popular!!! and I am loving the butterfly die cuts for the big shot!!!! I so have to get me some of them!!!!!!!
Things that FlyBlack White and Red... seems to be quite popular too.. but isn't it a beautiful and sophisticated colour combo???B&W and red - Stampin' UP! Brisbane Regionals 2010 Swaps I love it when you get something that is a little different or with a little treat in it... the white top not at the back has a bit of nougat in it... I love the little tea cup.. it is made on the bigshot with the pillow box... how cute is that??? In the little gift card there was a little surprise of loads of circle punched out confetti.. heheh... It was funny when someone open it and it all spill everywhere. And the Red, White and Eggplant is a bookmark that covers the corner of the pages in your book.... A neat idea...

More Stampin' UP! Brisbane Regionals 2010 Swap CardsI am loving this natural colour combo of the colours in the Elegant Soirée Papers $16.95 (Page 127 Australia Ideas Catalogue 2010-2011) (Baja Breeze, Soft Suede, Crumb Cake,
Very Vanilla, Basic Gray)

Shabby Chic - Stampin' UP! Brisbane Regionals 2010 Swaps
Classic - Stampin' UP! Brisbane Regionals 2010 SwapsAnd these ones are lovely too...

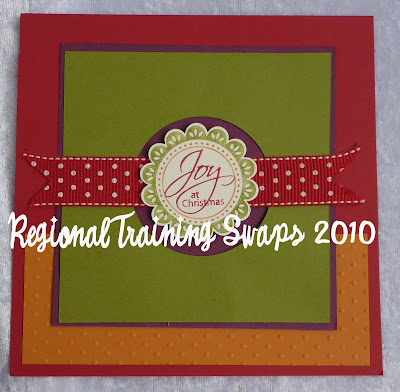
Bright - Stampin' UP! Brisbane Regionals 2010 SwapsI love the colour combo on this card.. It is not a colour combo that I would have put together but it really works... and I really like it.. bright and festive.. Just the way Christmas should be!!!

Really Bright - Stampin' UP! Brisbane Regionals 2010 SwapsAgain thanks to all those who swapped with me... there really is some great ideas here...

Happy creating...

Stampin UP! Brisbane Regionals Training 2010

What a great time we had at regionals this year... It's again always wonderful receiving swaps..
Thank you again to all who swapped with me... I only wish I had more time to do so because I came home with only half the amount swapped..... BECAUSE.....

I had an new experience this year.... It all started when I was contacted from head office and asked a week before regionals if I would be able to do a Workshop WOW... a presentation space had become available and someone suggested that I might be able to do something... Oh my GOODNESS!!!! The Pressure... What do you teach a room full of wonderfully creative and talented women and a few men???? While I stressed for a day or 2 about what I would teach.... I finished off my swaps.... Being that my time slot was a mere 5 minutes to present something of worth... Well it was not that I was worried about the talking... I could do that in a pinch.. but I really wanted to do something that might be of use to our demonstrators... After discussing my ideas with Liz we came to the conclusion that what I had done for my swaps was original and put a bit of a slant on something that most people might already know about... but just takes it that one step further into the creative realms...

So with that in mind I opened my presentation with the line.... "Hello everyone.. Today I am going to teach you all something that every crafter needs to have in their crafting diet.... How to de-stress and break up the fibers... ".. This was supposed to receive a decent amount of laughter.. but I fear people may have been asleep... or maybe my delivery was poor.. or too quick... anyway with no laughter forthcoming I decided to chuck a mini wobbly and pout and say "That was supposed to be funny... You were supposed to laugh...." Then came a few very forced laughs... Phew.. Thank goodness...
I then proceeded with my first demo of "how you can break up the fibers with a bone folder to create a flower with the scallop circle punch.... but if one was being "lazy" (what I meant to say was productive and time conscious....) you can use your crimper to break up the fibers in the card stock to pull the layers apart.."
While turning the handle of the crimper I made a creaky noise of the paper going backwards and forwards.. This did get laughs... and it was totally unintentional.... But apparently a highlight... heheh
(I didn't take a photo of this project.. but it is similar to ones I have made in the past..you can look at in on This blog Link)

Then I went on to say that just because you have broken the fibers in the paper you do not have to separate it totally.. you can separate portions of your embellishments to create more dimension and texture in your projects...

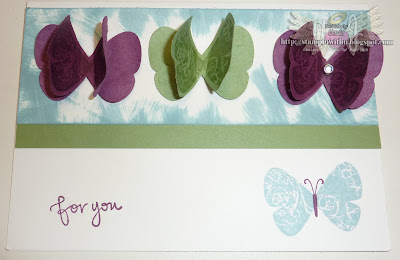
Separated Butterfly Wing CardI held up this butterfly card and said in your workshop you could have your customers simply punch out the butterflies but in your demo you could show how you have stepped it up with distressing and breaking up the fibers and putting a bit of bling on to dress it up a little...

I also showed my Swap card... the top one.. because it used the partial distressing and breaking up fibers technique...
Separated Flower Card Swap
This little project... Which was designed a week before regionls.... in the absence of customers at a display that Kate and I were doing.... (Apparently we should get board more often!! heheh)

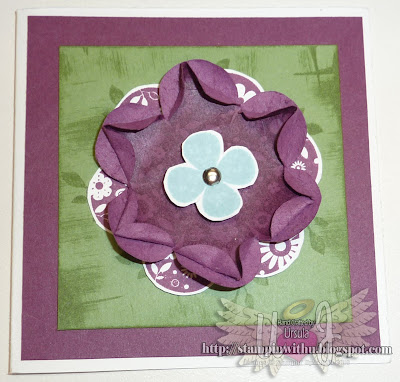
Small Square Seperated Flower Card
And lastly a Scrapbook page where the leaves on the vine were distressed...

Seperated Leaves Scrapbook PAge
And at the end I added that we need to become more like little children and not over analise what we do... We need to relax and become more free with our creativity.... That way we will come up with some wonderful ideas.. Just play and have fun... Then there is no limit to your creativity!!!

Liz and Bec Presented at this regional also... and despite how nervous we all felt our presentations went quite well...

The other presentation highlights for me was a fantastic paper rose made from a circle punch... Some wonderful water colouring techniques... The shimmer paints and how to use them... and then some other way to use all your inkers and change colours etc...

I am hanging out to try some of these techniques and products and to recreate some of the wonderful swaps that I received at Regionals.... It's all so exciting!!!

Convention 2010 - Sydney - Swaps Convo

I've been wanting to write a Blog entry for weeks now.. but have been lacking in time... Before Regional Training was coming up I wanted to share a funny conversation I had via email with another Demonstrator reguarding swaps....

One of the very exciting things of Conventions and Regional trainings is the swapping that takes place over the duration of these meetings... All the demonstrators make something like a card front to swap with other demonstrators.. This is not only a great way to meet other demonstrators but gives you so many inspirational projects to take home and try out or demo to your own customers.. Whilst we do thank each and everyone we swap with at the time of the exchange some peopel take the time out to thank individuals for these swaps.... something that I unfortunately often tend to do on my blog. But Carolyn took the time to individually thank me and I was really touched by her personal attention. It makes you feel really apprecciated.

Anyway we had this fantastically funny email exchange... And I just wanted to share it with you all.. I hope you get a laugh out of it.. Cause I sure did whilst writing it....

From: Carolyn
Sent: Wednesday, June 02, 2010 11:32 PM

Hi Ursula,

I just wanted to drop you a quick email to say thank you for your lovely Convention swap.

I've finally had time to sit down and have a good look at all of my bounty and I can see how much work you put into your bookmark. I'm learning so much from all of the swaps I've received. I hope you liked my earrings.

I'd like to invite you to be my friend on Facebook. It's a great way of keeping up with what everyone is up to. Find me at 'Carolyn Bennie Ink - Independent Stampin' Up! Demonstrator'

Cheers,
Carolyn

On 02/06/2010, at 11:15 PM, Ursula wrote:

Hi Carolyn.... I LOVED your earrings!!! I always try to do something left of center for convention.. and love to try and do something you can wear... I make beaded costume jewellery too so it is great to combine the 2.. and it NEVER fails to impress!!!
I have not yet had a chance to email and thank all the people who swapped with me... I love the ideas too... and am sure we will all be inspired for the whole year with our "bounty"as you so eloquently put it!!!!! It truly is a treasure!!! Makes you just want to roll around in them like you’re in mountains of money.. & giggle hysterically!!! ..... but shush... that's our dirty little secret.. cause someone may think I am a bit of a loony if that cat gets out of the bag!!! OK??? Mum's the word.... hehehehe
Would love to be your friend on FB... and visa versa.. I also like to have friends on FB.. hehe.. we are just crafting.... FB.. Stampin' Connections junkies!!! CAN'T get ENOUGH!!!
Thanks for thanking me for my swap... Thank you for yours too!!! LOVED them!!! I will wear them with PRIDE!!! oh and by the way they were so well presented.. I was impressed!!! Very professional!!!
Muwah.. and take care...

Ursula


From: Carolyn
Sent: Thursday, June 03, 2010 12:08 AM

Thanks for your thanks about my thanks Ursula. You've made me laugh. How much coffee have you had tonight??? And where can I get that brand?

I'm off to roll around in my swaps....

XX Carolyn


On 03/06/2010, at 7:29 AM, Ursula James wrote:

oh no no Coffee for me. Don't drink it.. and that is a good thing I think.... heheh..
I've just finished watching an episode of Glee, one of The Ultimate High school musical and 2 of TRAUMA... I am pumped to sing and dance my way to a bloody emergency... the adrenaline is a pumping... some guy in trauma had his arm ripped off by a concrete mincer and another guy got impaled on a concrete reo barb, some kids blew up a bird bath on Halloween and some gay bar went up in phosphorous smoke from the amazing piro techniques show on the night of their Halloween party... Another restaurant blew up in a cooking fat fire... The ambo got trashed by an old man with a base ball bat who was disgruntled because of how much he got charged for a trip in one... with his neck brace on... Um what else happened... heaps.... It's a great series.. and really does make the adrenaline pump.. and makes me SQUIRM.... but after a good nights sleep I think I am a little more settled... maybe...
Hope you had fun rolling in your swaps... heheh... That is quite funny.. I may just have to blog that... so my dirty little secret will be out.... hehe.
Have a great day... no more rolling in swaps ok.. cause it can be addictive too.... plus it could be a bit dangerous... a brad in the bottom is not nice...
Ursula


From: Carolyn
Sent: Thursday, June 03, 2010 8:23 AM

I didn't realize you have to be naked to roll in your swaps!! I've been doing it all wrong. Off to do it again. ;)

Friday 10 September 2010

Mayor's Gala Ball - Masquerade Ball 2010

I was able to assist Councillor Lisa Bradly by personalising a mask to match her gown for the Mayor's Gala Ball recently. It was a lovely thing to do and I believe Lisa said it was quite a conversational piece... Lisa was kind enough to send me a photo from the night... and I believe there is hearsay that Lisa (& her mask) may even have a cameo role in one of our local papers...
Councillor Lisa Bradly at Mayor's Masquerade Ball

The Mayoress Committee raised $40,000 for charities at last years Mayor's Gala Ball.

Congratulations on such a fantastic job! I am sure that this years was just as successful!!

The Mask I made for Councillor Lisa Bradly - Mayor's Masquerade Ball

Handcrafted by Ursula's Fan Box

Pinterest